")
I love old things. They have character. I often wonder what caused the cracks and chips and patina. If only they could tell stories.
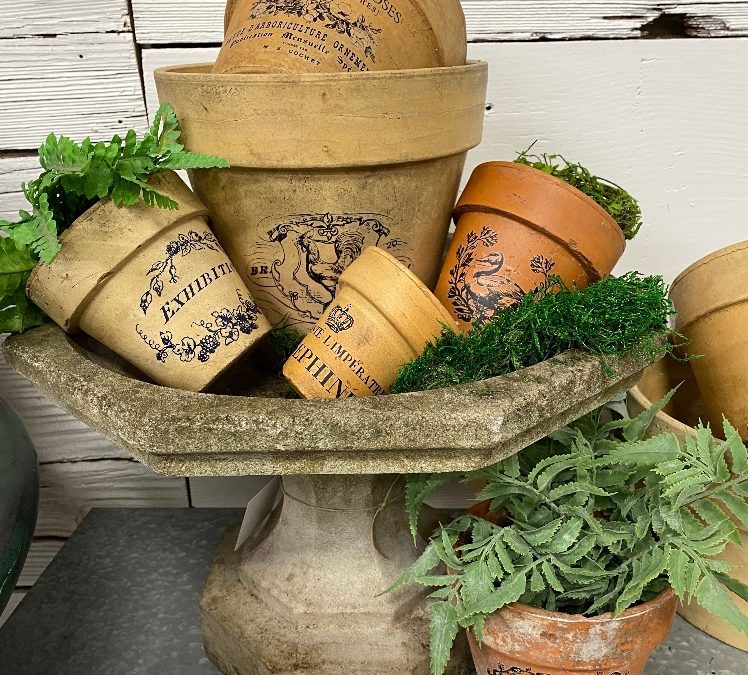
Recently I was at an estate sale and ran across old flower pots. I loved the color. I loved the chippy, vintage goodness that isn’t there with new pots. So I scooped them up and brought them home. I didn’t take me long to figure out what to do with them. I decided to add the IOD Traditional Pots transfers to them. Traditional Pots comes with four pages of pot-sized transfers in three colors: black, white, and china blue. So I set out to bring new life to the vintage pots. Today I’m going to show you how to create French pots!

The first thing I did was round up supplies. I knew it wouldn’t take much.
-
IOD Traditional Pots (includes applicator)
-
Clay Pot Sealer
-
painter’s tape
-
vinegar
Step 1:
Clean the pots. Rinse them off with a garden hose to get the loose dirt and debris off. Mix up 1 part vinegar to 3 parts water in a tub or sink. Submerge them and let them soak 20-30 minutes. Use a brush or scouring pad to scrub loose the mineral build up. Then run them through the dishwasher to wash off the vinegar residue.
Step 2:
Clay pots are porous and allow moisture from the soil to seep through the clay and evaporate. While this is good for plants, it’s not good for paint or decor attached to the pot. So the next step is to seal the clay so water can’t seep through. I used Clay Pot Sealer to seal the pots. You can find it in my Amazon store. I wasn’t able to find it at my local hardware store nor Hobby Lobby. I sprayed two coats inside and one outside in preparation for applying the transfers.

Step 3:
Apply the transfer. I waited 24 hours for the sealer to dry well before I applied them. I selected a transfer that would fit the size of the pot. Don’t feel like you have to use the whole transfer. There were some that I trimmed words or images off of so they would fit. Tape in place and use the applicator stick included in the package to rub the transfer onto the pot. This video might be helpful if you’ve never applied a transfer before. Once the image has transferred to the pot, make sure to burnish the edges by rubbing the clear transfer paper over the image to ensure all of the edges have adhered.

Step 4:
Once the transfer is in place, it’s time to seal the transfer. I sprayed a second coat of Clay Pot Sealer over the whole exterior of the pot. The nice thing about it is that it doesn’t have a gloss finish so it maintained the vintage look of the pots. I could not find any information on whether the sealer would yellow over time. If it does, it won’t likely show on the pots.
And that’s it! Aren’t they cute?? I’m all ready for spring planting!
I’d love to see your pictures if you make some, too!
This post contains affiliate links. As an Amazon Associate I earn from qualifying purchases.


Love them!! I will be on the hunt for old clay pots!
I know, right!? I want to make more, too!